If you're not interested in the process by which I produced the loading screen, then
you can jump directly to the current state of the project.
Jan 5th, 2006: Colour scheme
Given the number of pixels in a Spectrum screen, I decided it was only
going to be practical to do this with mini beads.
There are around 48 different colours of mini beads, so my first task was
to determine which would be best suited to reproduce the Spectrum palette.
Here is my first attempt:
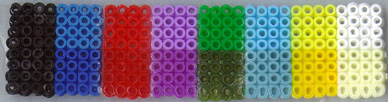
I felt there was not enough distinction between the two reds, and was not
happy with green at all. I couldn't find anything that would give a very light
grey for non-bright white, so had to settle for a light cream colour.
Here's my next attempt:
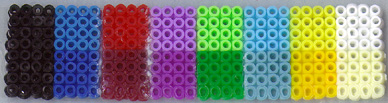
Although I'm not enormously happy with the dark red or white, I think this is
the best I can do with the colours there are.
Next step is to work out the correct names for the colours I've chosen and
buy some packs of beads - I started with a mixed pack, but it would take hours to
sort that out into colours, and 33 of the 48 colours are not needed anyway!
The pictures show a couple of early lessons I've learned: you can't stick Hama
beads with super glue, and the mini beads need a gentle touch with the iron - I
managed to flatten a load of pins on the backing board with this attempt - not a
good start!
Jan 6th, 2006: Select the loading screen
My current favourite is Doomdark's Revenge - mostly because it was my favourite
Spectrum game (well, apart from The Bard's Tale, but that doesn't have a very good
loading screen for this purpose).
Other possibilities include: Jet Pac, Atic Atac, Out Run.
Jan 10th, 2006: Bead colour names/codes
Here are the names and colours of the beads that I've figured out from my
palette:
| Spectrum Colour
| Normal
| Hama Code
| Bright
| Hama Code
|
| Black
| Black | 501-18
| Black | 501-18
|
| Blue
| Dark Blue | 501-08
| Sky Blue | 501-41
|
| Red
| Burgundy | 501-30
| Red | 501-05
|
| Magenta
| Purple | 501-07
| Pastel Mauve | 501-45
|
| Green
| Light Green | 501-11
| Pastel Green | 501-47
|
| Cyan
| Pale Blue | 501-31
| Pastel Blue | 501-46
|
| Yellow
| Yellow | 501-03
| Pastel Yellow | 501-43
|
| White
| Cream | 501-02
| White | 501-01
|
Feb 16th, 2006: Order the beads
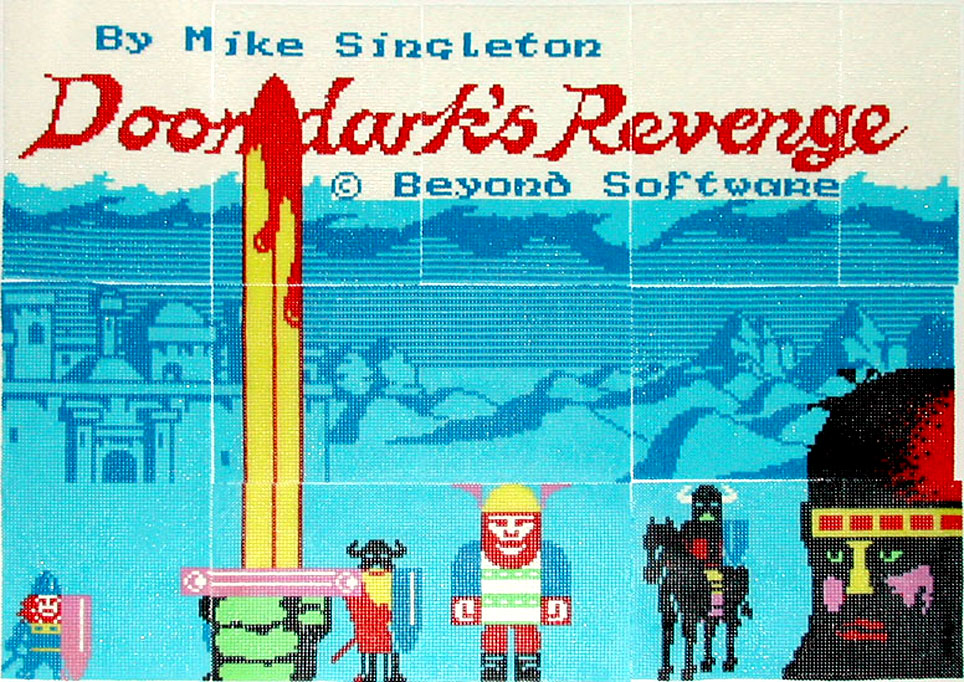
I finally decided to pick Doomdark's Revenge loading screen, which only uses the bright colours.
Here it is:
Looking at the loading screen I've decided that the "bright magenta" colour is not really well represented by
"Pastel Mauve", but better by "Pastel Light Mauve 501-48", so I've modified my palette accordingly.
I've ordered a bag of 2000 of each of the bright colours (plus Black) from a nice chap on eBay. That's 14,000
beads, but I'll eventually be needing a lot more to reach the 49,152 needed for the entire screen!
Feb 18th, 2006: Start laying down the beads...
I've got my first lot of beads, so now's the time to start laying them down.
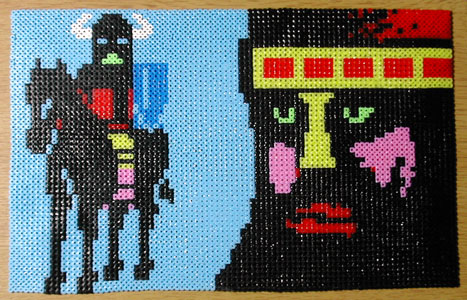
I was very excited to complete my first character cell:
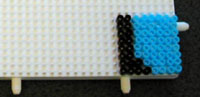
And then my first row:
I learned at this stage that a pair of tweezers is essential - there's no way you can do all this with
fingers.
The peg board is 56 x 56 pegs, which makes for 7 rows of 7 characters, each 8 x 8 beads. The full screen is then
about 4 1/2 boards across and 3 1/2 boards high.
You can already see an example of colour clash - the red sword in the same character as the toes makes the toes red
too. I decided to retain the colour clash from the original, despite the fact that I could fix it and possibly
produce a better looking (but not authentic) picture.
I'd completed more than half of this board, when I started on the blue. I realised that there was not enough
contrast between the blue I had chosen and the cyan - and as these two colours predominate in the picture I needed
to get this right. So I completed what I could by getting blue beads from the mixed bag of 7,500 beads I originally ordered,
and ordered two bags of "Blue 501-09":
So now I've got my final palette, at least for the bright colours:
| Spectrum Colour
| Normal
| Hama Code
| Bright
| Hama Code
|
| Black
| Black | 501-18
| Black | 501-18
|
| Blue
| Dark Blue | 501-08
| Blue | 501-09
|
| Red
| Burgundy | 501-30
| Red | 501-05
|
| Magenta
| Purple | 501-07
| Pastel Pale Mauve | 501-48
|
| Green
| Light Green | 501-11
| Pastel Green | 501-47
|
| Cyan
| Pale Blue | 501-31
| Pastel Blue | 501-46
|
| Yellow
| Yellow | 501-03
| Pastel Yellow | 501-43
|
| White
| White | 501-01
| Cream | 501-02
|
Feb 19th, 2006: Nearly complete the first tile...
So, I continued to complete my first "tile" of two boards, all except for the blue beads.
I decided on the second board that it would be quicker to do all of each colour at once, rather
than to do complete characters or rows. I also started tipping piles of beads directly onto the board
and then positioning them from there, rather than transferring beads one by one from a bowl. I have to say,
the large areas of pastel blue are fairly tedious to fill!
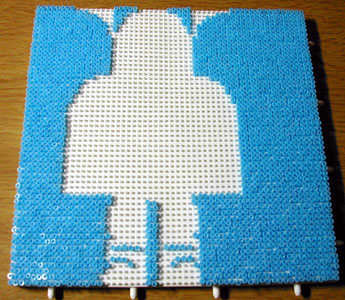
And here's the tile completed, except for the blue beads.
I've now got to wait until the blue beads arrive.
In the meantime, here's the loading screen divided (fairly arbitrarily) into the ten tiles that I can
make with my two boards:
The one I've chosen to start with is the bottom middle.
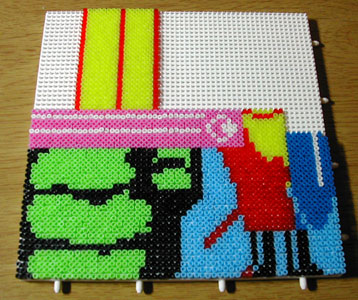
Feb 24th, 2006: Complete the first tile...
I've now got the blue beads, and complete the first tile:
In the meantime I've ordered more blue, pastel blue and black beads as I'm going to need a lot more of them
to complete the next few tiles.
At this point I take a deep breath, and get the iron out. I've not tried ironing this many mini beads in one
go before, so I was concerned that I'd mess it up! In fact I was a bit too tentative, and managed to lift a few
groups of beads off the board. I fixed that, and managed to get all beads ironed successfully, although I wasn't
very happy with the bottom edge - the beads got wrapped a little over the edge.
I also learned a lesson at this point - if you want to keep the bead's appearance, you need to create a mirror
image on the board. The way I had done it, I was always going to get the ironed side to look at. Having realised
this, I decided I would iron all the tiles on both sides.
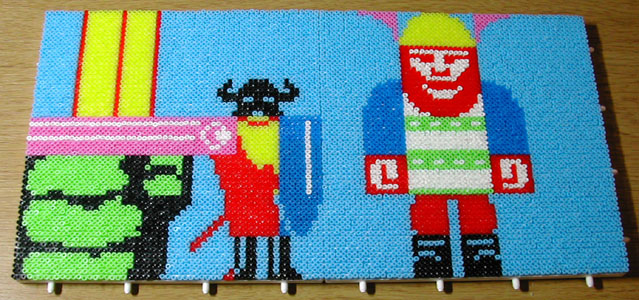
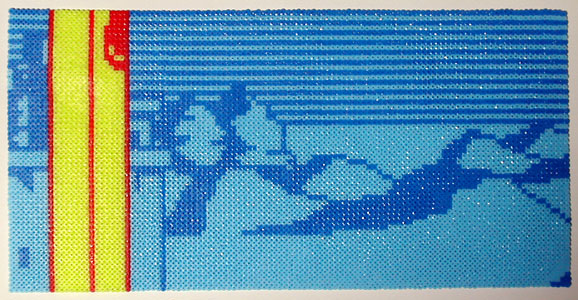
And here's the finished, ironed first tile:
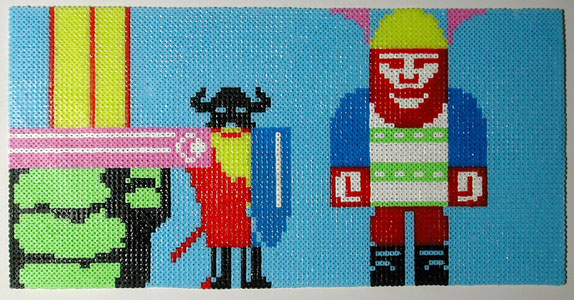
For comparison, here's a blown-up section of the loading screen:
I have to say I'm pretty happy with that!
Feb 25th, 2006: Complete the second tile
Now I'm on a roll. This weekend I finished the second tile, the bottom right:
Now I have two tiles, I have to think about how to join them. The edges are not perfectly straight, so I need
to think about whether to cut them, or possibly to use the iron to straighten them. In hindsight, I think it may
have been a good idea to include an extra row of beads all around the actual image, so that I could trim them off
to get a good edge. Maybe my ironing skills will improve and that won't be necessary ;-)
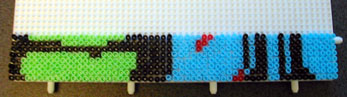
Feb 26th, 2006: Complete the third tile
And another one done. Only four colours involved in this one:
I did a much better job of ironing this one - instead of the usual back and forth, round and round action
I tend to use on clothes ("when was that?" my wife asks...) I used a single, slow sideways movement of the iron from
one side of the tile to the other. Unfortunately I then discovered I'd missed the seven blue beads in the bottom right
corner (they were pastel blue before the picture was taken), so I had to cut them out, and iron in seven new beads.
It doesn't look too bad, but it was a shame after doing a good initial job.
Feb 28th, 2006: Completed the fourth tile
The main issue with this tile is that although it has the same number of beads across as the one below it (bottom
right), the ironed tiles differ in width by a little over one bead's diameter. Obviously there is some stretching or
compression that goes on during ironing that produces inconsistencies. I'll have to try to figure out how to fix that.
March 10th, 2006: Almost finished the top row
I've now done all the top row tiles except the one on the left hand side. All that's left now is to complete the
two tiles on the left side, and then join them all together.
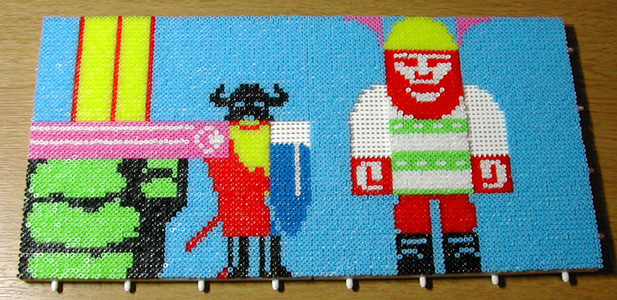
Mar 10th, 2006: Eight out of ten
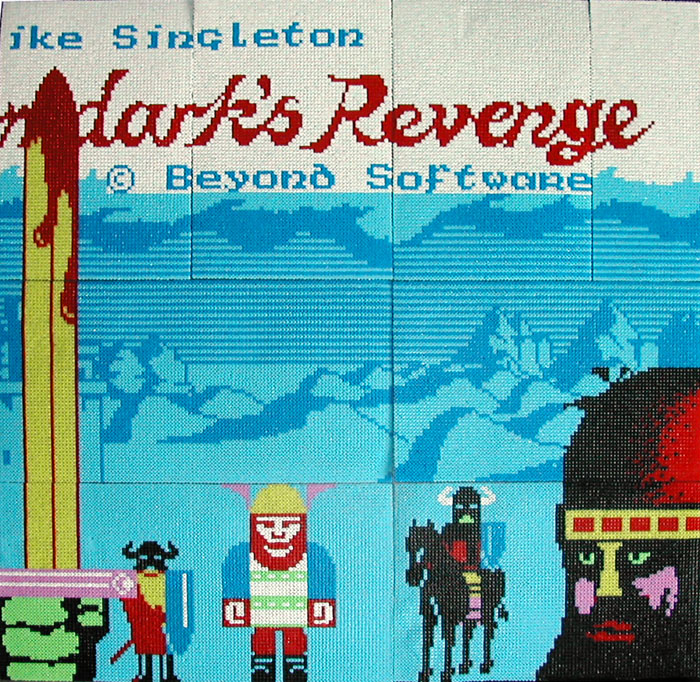
Here's screen with eight out of ten tiles done:
July 10th, 2006: All tiles completed
Here's the complete screen:
Future
I need to figure out how to join the tiles, or at lest minimise the appearance of the joins.
The tiles that I've made don't match exactly in size, in some cases there is two bead's worth of difference in
length, so I'm going to have to figure out how to sort that out so that I get a good fit at the end. I may have to
re-do the worst tiles.
The ZX Spectrum Screen
The Sinclair ZX Spectrum screen is made up of 24 rows of 32 characters. Each character is
an eight by eight grid of pixels. Each pixel is represented by a bead. This makes for a full screen size
of 256 pixels across and 192 pixels down.
The design of the Spectrum screen has two colours for each character, called the ink and paper. Each of the
64 (8 x 8) pixels in a character can be either the paper colour or the ink colour, so there is not much variation,
and frequently pixels end up being the wrong colour for the picture due to this restriction - known as
colour clash. See my first row in beads that illustrates this.
There are two additional possibilities - each character can flash (a bit difficult to simulate with beads!) or
both the ink and paper colours can be normal or bright (not individually).
In the Doomdark's Revenge loading screen, all the characters are bright, so 7 colours and black are required.